Learn how to clean your CPU step-by-step with this simple, safe, and beginner-friendly guide. Keep your system running cool and smooth with proper care.
Keeping your CPU clean is essential for maintaining good airflow, reducing heat buildup, and extending the life of your computer. Dust and debris can easily accumulate over time, especially if the computer is used in an area with poor ventilation or pets. In this guide, you’ll learn how to clean your CPU properly—no complicated tools required.
Step 1: Prepare Your Workspace
Before diving into the cleaning process, it’s important to prepare your environment. A safe and clean workspace ensures that both you and your components are protected during the process.
Make sure you:
- Turn off your PC and unplug it from the power source.
- Move to a flat surface with good lighting and minimal static electricity (avoid carpets if possible).
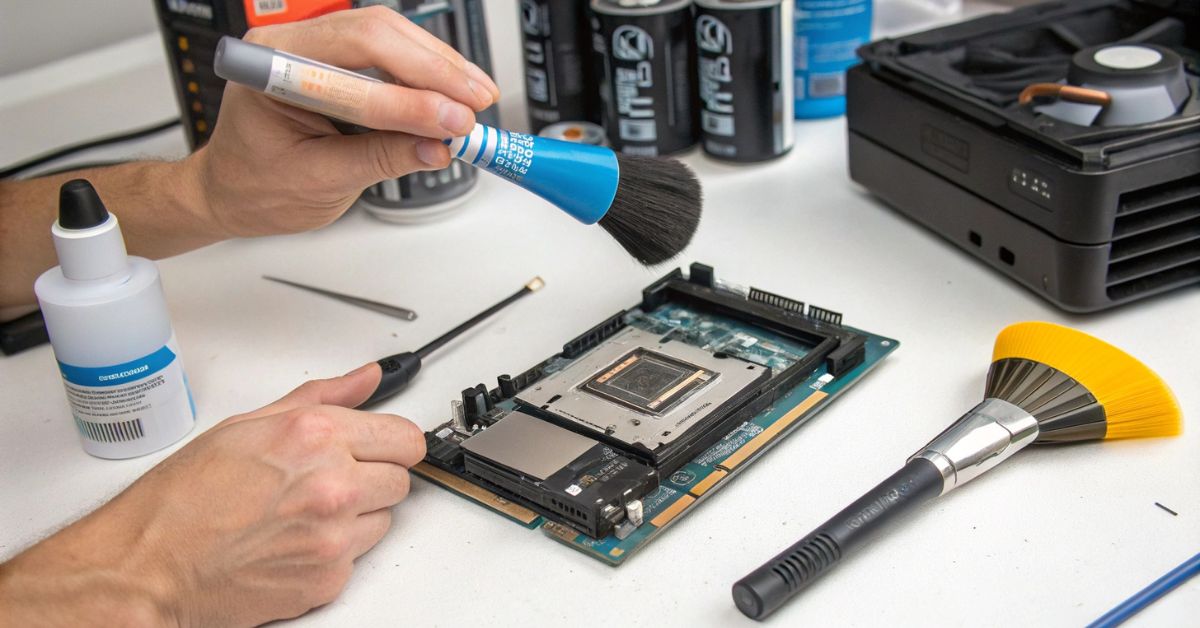
- Gather your tools: a soft brush, compressed air can, isopropyl alcohol (90% or higher), microfiber cloth, and a screwdriver.
Step 2: Open the Computer Case
Now that your workspace is ready, it’s time to access the CPU and internal components. This step involves removing the side panel of your computer case.
Use the screwdriver to carefully unscrew and remove the side panel. Set the screws aside in a safe place. Take a look inside—if there’s visible dust buildup, you’re doing the right thing by cleaning it now.
Step 3: Remove Dust from the Interior
Before touching the CPU, it’s smart to clean the surrounding components. Dust can affect more than just the processor—it can clog fans, vents, and filters.
Use compressed air to blow dust off components like:
- Case fans
- Power supply unit (from the outside)
- Graphics card
- Motherboard surface
Use short bursts of air and keep the can upright to avoid moisture spray. A soft brush can help dislodge stubborn dust, especially in tight corners.
Step 4: Clean the CPU Fan and Heatsink
The CPU cooler is often the dustiest part of the system. Cleaning it helps reduce temperature spikes and maintains stable performance.
Carefully disconnect the CPU fan’s power cable from the motherboard. Unscrew or unclip the cooler from the CPU socket. Once it’s detached:
- Blow air through the heatsink fins to remove trapped dust.
- Wipe the fan blades gently with a dry microfiber cloth or soft brush.
If there’s caked-on grime, dampen a cloth with isopropyl alcohol and gently wipe it clean. Let it dry fully before reinstallation.
Step 5: Clean and Reapply Thermal Paste
Cleaning the CPU itself requires patience and precision. You’ll also need to reapply thermal paste to ensure efficient heat transfer between the CPU and cooler.
- Gently twist the cooler to loosen it from the CPU if it seems stuck.
- Once removed, use isopropyl alcohol and a lint-free cloth to wipe away the old thermal paste from both the CPU surface and the bottom of the cooler.
- Let both surfaces dry completely.
- Apply a small pea-sized amount of new thermal paste to the center of the CPU.
When you reinstall the cooler, the pressure will spread the paste evenly.
Step 6: Reassemble and Test
Once everything is clean and dry, it’s time to put your system back together. This final step ensures that all components are connected properly before powering on.
- Reattach the CPU cooler and connect the fan cable.
- Screw the side panel back on.
- Plug in the computer and turn it on.
Check the system’s performance and temperature to confirm everything is working as expected. You should notice quieter fans and possibly lower operating temperatures.
How to properly clean your CPU?
To properly clean your CPU (the central processor itself, not just the cooler), follow these steps carefully:
Tools Needed:
- Isopropyl alcohol (90% or higher)
- Lint-free cloth or coffee filter
- Thermal paste (for reapplication)
- Compressed air (optional)
- Screwdriver (to remove CPU cooler)
Steps:
- Turn off and unplug your PC.
- Remove the CPU cooler by unscrewing or unclipping it from the motherboard.
- Clean off the old thermal paste from the top of the CPU and the bottom of the cooler using a cloth dampened with isopropyl alcohol.
- Let both parts dry fully.
- Apply a small amount of new thermal paste (pea-sized) on the CPU.
- Reattach the cooler, making sure it’s secure.
- Plug everything back in and power on the system.
Avoid touching the CPU pins, and don’t use water or household cleaners.
Does a CPU need to be cleaned?

Yes, but only under specific conditions. The CPU itself doesn’t get “dusty,” but:
- The thermal paste between the CPU and cooler needs to be refreshed every 1–2 years.
- The CPU cooler (fan and heatsink) collects dust, which should be cleaned every few months.
- Cleaning prevents overheating, throttling, and long-term damage.
You don’t need to remove the CPU from the socket unless you’re replacing it or applying new paste.
How to clean a PC to run faster?
Cleaning your PC can improve airflow and cooling, which helps maintain performance. Here’s how:
Physically Clean:
- Dust out fans, vents, and heatsinks with compressed air.
- Clean CPU and GPU coolers.
- Replace thermal paste if temperatures are high.
- Keep cables tidy for better airflow.
Digitally Clean:
- Uninstall unused programs.
- Clear temporary files and browser cache.
- Disable startup programs.
- Scan for malware.
- Upgrade to SSD or add more RAM if needed.
Regular maintenance = smoother, faster PC.
Can I wash my CPU with water?
Absolutely not.
Water can damage electronic components—even if you dry them afterward.
- Never wash your CPU, motherboard, or any internal part with water.
- Only use isopropyl alcohol for safe cleaning of the processor surface or thermal paste.
If you need to clean components like fans or cases, you can gently wipe those with a damp cloth after unplugging and removing them—but never soak or rinse anything electronic.
Final Thoughts:
Cleaning your CPU doesn’t have to be complicated or intimidating. With the right tools and a little care, you can improve your system’s performance and longevity significantly. Try to clean your CPU and internal components every 3 to 6 months, especially if your environment is dusty or pet-friendly.
A clean PC is a happy PC—and it rewards you with better performance and fewer overheating issues.
Also Read:


